
Friday, August 8, 2014
Quilt Ladder
Here's the quilt ladder that my brother Mike (twin) built for me. Made from white oak. It holds 8 quilts and six of these are queen size, made from Bonnie Hunter's free patterns or mystery quilts. Top row: Easy Street mystery and Sister's Choice free pattern; Second row: Scrappy Trips and Oklahoma Backroads free patterns; Third row: Cathedral Stars free pattern and Lazy Sunday mystery. Bottom row: Ada's Stars and Li'l Twister. So excited to have this new way to display some of my quilts.
Wednesday, July 9, 2014
Cathedral Stars
This is the latest of the quilts I have made from Bonnie Hunter's free patterns. However, I did use a different technique for the star points which was from a pattern called Rising Stars, a Strip Club pattern from Cozy Quilt Designs. My granddaughter helped pick out the border fabric.

My New Bag
Over a year ago, my sister who lives in Hickory, North Carolina, asked me to start saving the selvage edges of my fabrics for her. When I was cutting (or tearing) them off, I included about 1/2" of the fabric design. She came to visit for the 4th of July weekend and I just have to share what she brought me made from some of those selvages. A large tote bag, measuring 20 x 12 x 5 !! I love it!! Thank you, Jane!

She also made me a cosmetic bag and a couple of hotpads. But I was most excited about this.
She also made me a cosmetic bag and a couple of hotpads. But I was most excited about this.
Monday, June 30, 2014
Lake Retreat
Three of my quilting friends from Huntsville, Alabama came to Andalusia on June 27, 2014 and we spent the weekend at the lake house belonging to a local quilting friend. I had a mystery quilt planned for the weekend. So we sewed, ate lots of good food, sewed, ate lots of good food, sewed, etc. etc. We did take a break for a pontoon boat ride on Saturday afternoon. Here are a few pictures of the quilting ladies and their mystery quilt tops (except for borders). We had a great time!


.jpg)

Friday, May 30, 2014
Round Robin
When my sister was here for Thanksgiving, she told me about a class she is taking in Winston-Salem, NC, called Head for the Border. The purpose of the class is to challenge creativity and quilting skills by making your own Round Robin quilt. Skills to be learned: designing borders, using math to make them fit the previous round, use of color and piecing skills. The group meets once a month. The first step for the members was to decide on their center block, which could be either square or rectangle, and one measurement being at least 12" to 18" finished size. Color chips were placed in one bag and various design elements (square, rectangle, triangle, flying geese, quarter square triangles, etc.) were placed in another bag. At each meeting, a color and design element are drawn from the bags to indicate what is to be used in the next round of the quilt. Unlike other round robins, each person works only on their own quilt. Unlimited spacer/accent borders may be used throughout the quilt and border width is each person's personal choice. Cornerstones may also be used.
So I decided that even though I cannot attend the classes, my sister can send me the information each month and I can do this along with them. She already had the information for the first round, so I was able to start with a center square and first border.
Here's my center square. The name of this block is Chicopee Square and I found it in an issue of Quilt Magazine.

November - Round 1: The first color and design element that had been drawn were black and a rectangle.....so here's my square and first "round."

December - Round 2: They had another meeting this week and the color drawn is green and the design element is flying geese. Since I had some flying geese elements in my center square, I decided to just carry them over into this second "round." (Probably should have used the flying geese all the way around, but it's MY quilt, so I did it like I wanted to.......anyone surprised?!)

Will continue to add to this post each month as I add another "round." Not sure how many more "rounds" there will be.
January - Round 3: Color and design element drawn for Round 3 are brown and squares. I chose to do a Seminole border, using red with the brown I chose. Then I went ahead and added a black spacer border to make the quilt now measure 30-1/2 square (30" finished), so that will give me several size options for the next border.

No meeting in February, so I will have to wait until end of March for next color and element.
March - Round 4: Color is purple and design element is square-in-a-square. Since my Seminole border squares are on point, I decided to add two sets of triangles to my square-in-a-square block so that the square would sit square in this border. The squares are 3" finished and the rectangle spacers are 1-1/2" x 3" finished. The quilt now measures 36-1/2" square (36" finished).

April - Round 5: Color is orange and design element is a quilt block. I decided to use a 6-inch Sawtooth Star block. The orange is a batik fabric with yellows, greens, purples, and turquoises in the pattern. I added another narrow black border to make my block finish at 54" so that gives me several different sizes I can use for my next and final Round Robin border.

May - Final Border: The final design element was applique and the colors that were left were red, blue and yellow. The instructions were that we could add a border with any or all of the colors with applique on the border or we could put applique anywhere else on the quilt we wanted. Since I don't like to do applique, I chose the simplest design and method, fusible web, and added a flower to the center of my beginning block. I added a yellow batik border. Most all of the fabric in the quilt are batiks. Here is the final quilt. It will measure 62" square when finished. I will bind with black when I finish quilting it.

So I decided that even though I cannot attend the classes, my sister can send me the information each month and I can do this along with them. She already had the information for the first round, so I was able to start with a center square and first border.
Here's my center square. The name of this block is Chicopee Square and I found it in an issue of Quilt Magazine.

November - Round 1: The first color and design element that had been drawn were black and a rectangle.....so here's my square and first "round."

December - Round 2: They had another meeting this week and the color drawn is green and the design element is flying geese. Since I had some flying geese elements in my center square, I decided to just carry them over into this second "round." (Probably should have used the flying geese all the way around, but it's MY quilt, so I did it like I wanted to.......anyone surprised?!)

Will continue to add to this post each month as I add another "round." Not sure how many more "rounds" there will be.
January - Round 3: Color and design element drawn for Round 3 are brown and squares. I chose to do a Seminole border, using red with the brown I chose. Then I went ahead and added a black spacer border to make the quilt now measure 30-1/2 square (30" finished), so that will give me several size options for the next border.
No meeting in February, so I will have to wait until end of March for next color and element.
March - Round 4: Color is purple and design element is square-in-a-square. Since my Seminole border squares are on point, I decided to add two sets of triangles to my square-in-a-square block so that the square would sit square in this border. The squares are 3" finished and the rectangle spacers are 1-1/2" x 3" finished. The quilt now measures 36-1/2" square (36" finished).
April - Round 5: Color is orange and design element is a quilt block. I decided to use a 6-inch Sawtooth Star block. The orange is a batik fabric with yellows, greens, purples, and turquoises in the pattern. I added another narrow black border to make my block finish at 54" so that gives me several different sizes I can use for my next and final Round Robin border.
May - Final Border: The final design element was applique and the colors that were left were red, blue and yellow. The instructions were that we could add a border with any or all of the colors with applique on the border or we could put applique anywhere else on the quilt we wanted. Since I don't like to do applique, I chose the simplest design and method, fusible web, and added a flower to the center of my beginning block. I added a yellow batik border. Most all of the fabric in the quilt are batiks. Here is the final quilt. It will measure 62" square when finished. I will bind with black when I finish quilting it.
Wednesday, May 28, 2014
Carolina Backroads
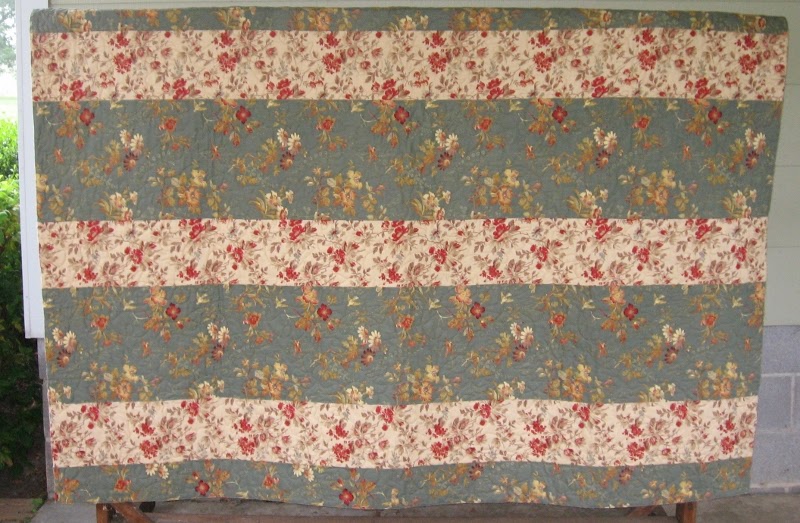
This is another queen size quilt made from a Bonnie Hunter free pattern called Oklahoma Backroads. Since I live in Carolina Community outside of Andalusia, Alabama, I am calling mine Carolina Backroads.
It was just another fun, scrappy quilt to do. All of the fabrics, backing included, came from my stash. I mixed batiks with traditional cottons. Love it when that happens! Here are pics of front and back.

It was just another fun, scrappy quilt to do. All of the fabrics, backing included, came from my stash. I mixed batiks with traditional cottons. Love it when that happens! Here are pics of front and back.
Sunday, May 4, 2014
Bamboo & Pinwheels
I saw the Bamboo quilt in a shop near Hickory, NC, when visiting my sister a few years ago. When you purchase the required amount of fabric for a particular size called for in the instructions, construct the number of blocks called for with the simple strip piecing method, cut that block on the diagonal, you will get enough blocks for two completely different quilts that size. The pattern is called Bamboo and Pinwheels by Diana McClun and Laura Nownes. Here are the two twin size quilts I got using a variety of batiks from my stash.
Bamboo

Pinwheels

Bamboo
Pinwheels
Subscribe to:
Posts (Atom)